- In this article, you'll learn how to package dynamic content from different sources to upload it into Amplifire.
- For more information on other media, check out Multimedia Best Practices.
Interactive content can help to bring your Amplifire content to life. There are several steps you’ll need to take to prepare your dynamic content, and you’ll need the original tool used to create the content to make the changes rather than only working with the published files.
Amplifire allows the following types of dynamic content that need to be prepared for Amplifire Upload:
Storyline
In Articulate Storyline, you'll need to make changes to some settings before being able to publish.
Player Settings
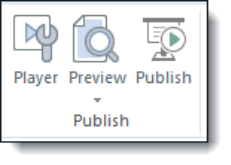
From Storyline, click the Player icon in the Publish menu to set player settings:
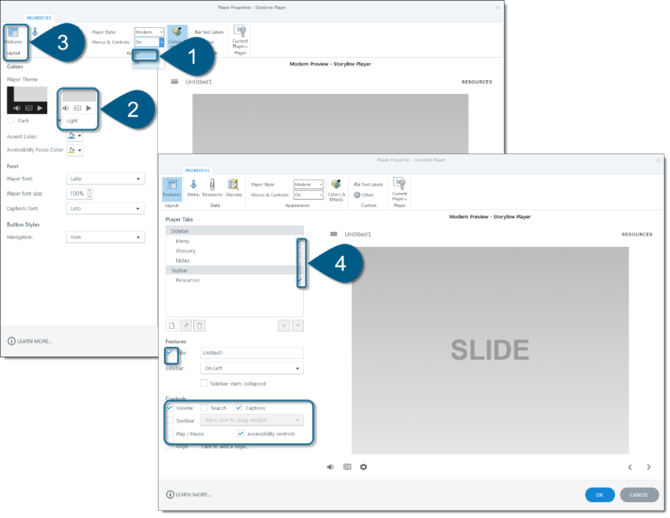
- Under Colors & Effects, turn on the Modern Player.
- Select the Light background.
- Click Features to show features.
- Deselect all of the features that go around the screen, including:
- Sidebar
- Topbar
- Title
- Controls
Publishing
Next, to publish your project:
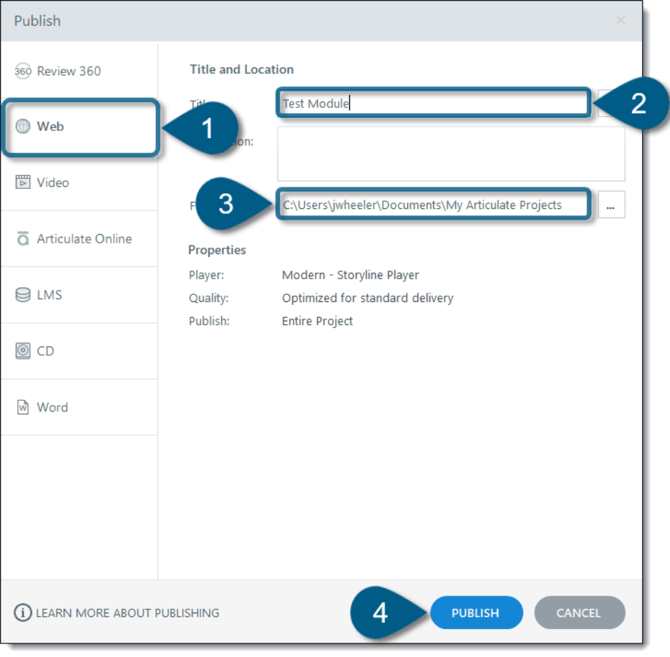
- Select Publish to Web
- Title your project
- Select a location for the file to be published
- Click Publish
- Zip the file.
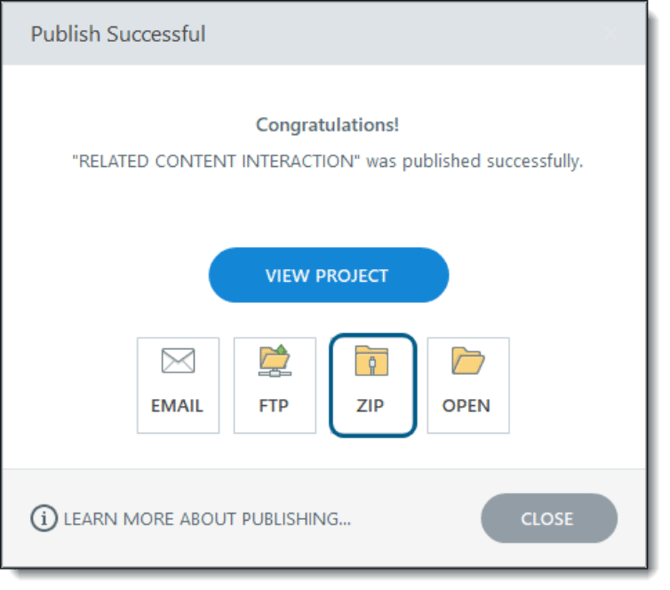
Articulate Rise
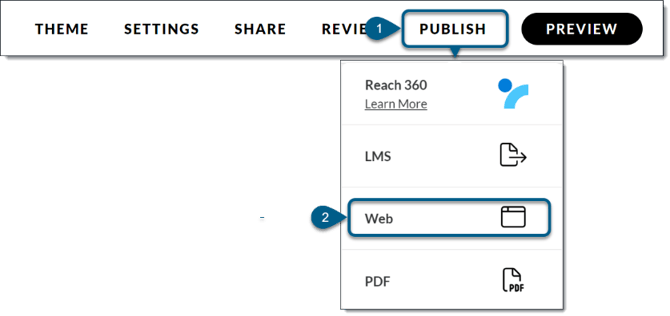
Once you’ve created your course and set the theme, you can publish by using the publish button in the top menu.
- Click Publish.
- Select Web from the dropdown list.
Once your course has published successfully, it will download directly into the file you have set up to accept downloads from the Web, and you will see a success screen.

Adobe Captivate
Open the interaction in the Captivate tool. Because Amplifire does not interface with the reporting functions in Captivate, those functions need to be disabled.
Preferences
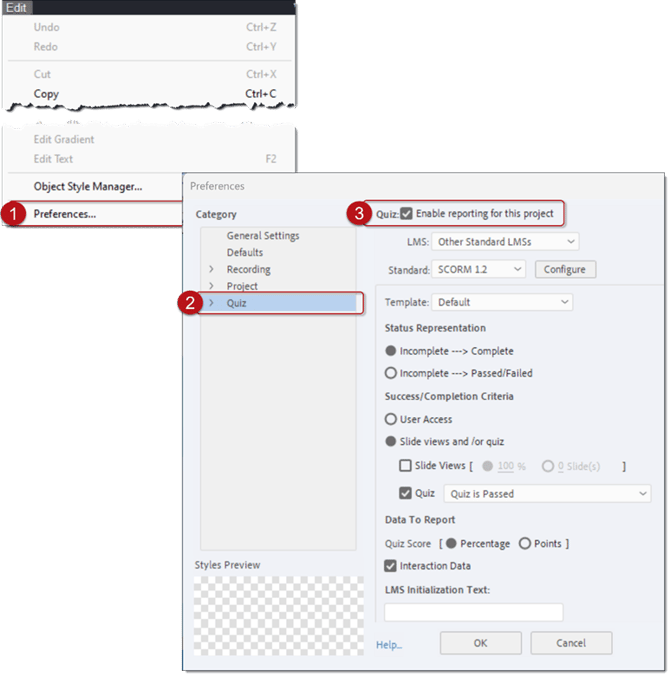
From the Edit tab:
- Click Preferences
- Click on the Quiz menu
- Uncheck the “Enable reporting for this project” box
- Click OK
Skin Settings
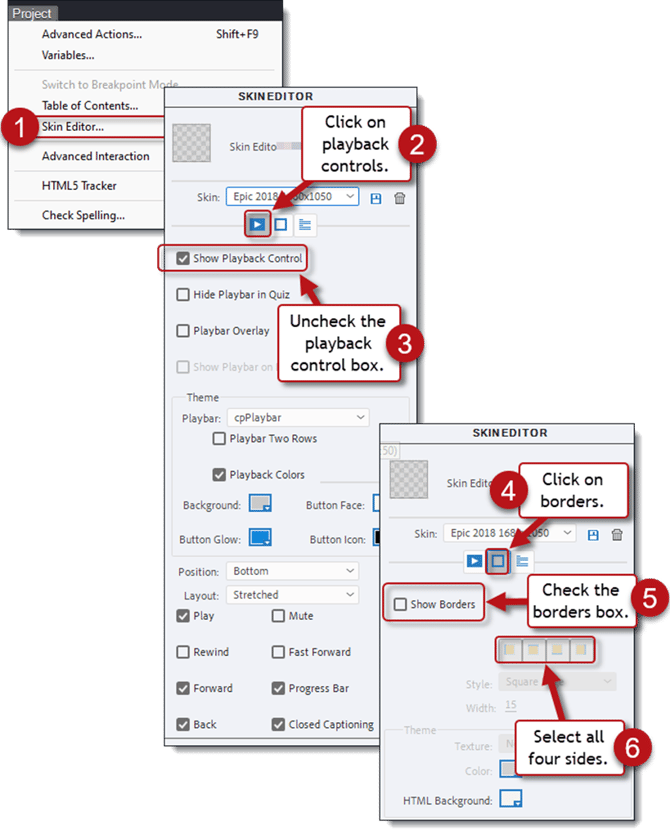
Amplifire’s dynamic content sizing tool needs a clear outline to size properly. To edit the skin settings, from the Project tab:
- Click on the Skin Editor
- Select the playback controls
- Uncheck the playback control box, which will gray out the other boxes below
- Click on Borders
- Check the borders box
- Select all four sides to add the borders
Publishing
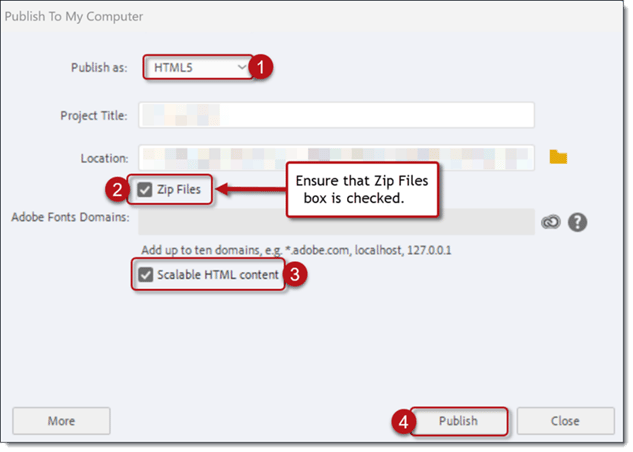
Once your settings are updated, you’re ready to publish. Select the Publish to my computer option, and:
- Select HTML5 as the publish option
- Ensure that the Zip Files box is checked
- Ensure that the Scalable HTML content is checked
- Click Publish
Uploading Dynamic Content to Amplifire
When you're ready to upload your dynamic content, open the field in Amplifire into which you’d like to add the interactive and click the  icon:
icon:
- Decide if you want to use an embedded interactive or an overlay (we recommend overlay)
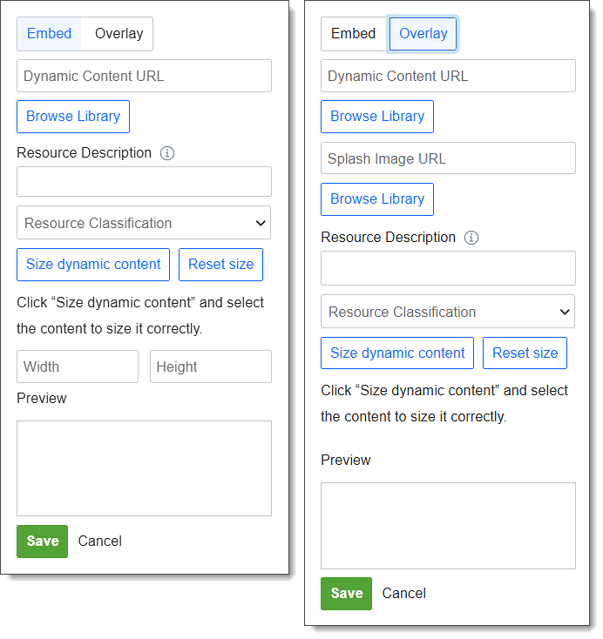
- Click Browse Library below the Dynamic Content URL field
- Click + Upload Resources
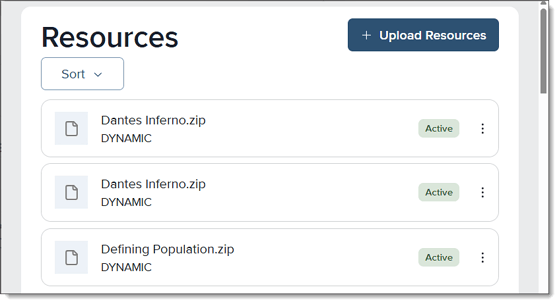
- Upload the zip file
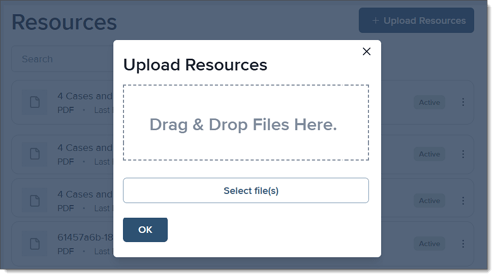
- Click OK
- Find your file in the list—it should be at the top—and click Select.
If you're using the overlay option, you'll have to take some additional steps to add the image that will display to learners to click on to view the interactive. To add the splash image, follow the same process as above to add an image.
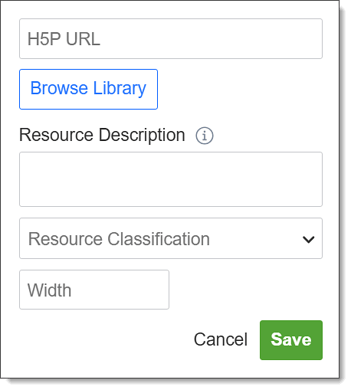
Once you have your files attached, add a resource description—similar to alt text—and a resource classification. Then click Save.
Note: Dynamic content zip files cannot be bigger than 20 mb when using the Upload Resources option. If you drag the interactive directly into the field, files can be as large as 100 mb.
H5P
Once you’ve created your H5P content, save the content. To use it in Amplifire:
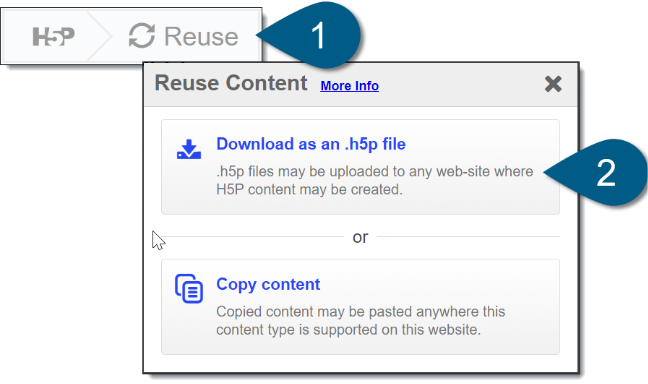
- Click Reuse in the bottom left corner of the H5P content screen that appears once you’ve saved.
- Click Download as an .h5p file.
Once the file downloads, go to the question into which you would like to add the interactive and click  .
.
Once the menu comes up:
- Click Browse Library.
- Click + Upload Resources and browse for your downloaded H5P content.
- Click Ok.
- Add your resource description and classification.
- Click Save.